Rocker Tee + DIY
/


The theme of these weeks blog posts appears to be choker tops! I really didn't do that on purpose. But this is a fun post because it has a little DIY project involved!
I LOVE graphic tees. You can search 'graphic tee' on my blog and see lots of examples of ways I love to wear them. I just think they're so fun and easy to throw on with jeans or leggings, or dress up with sequin skirts or leather pants. Oh the possibilities.
With this tee, I actually bought two - one in a size M to wear regularly, and one in a size L to cut. Feel free to make fun of me now. I wanted the cut one to be on the baggier side and still have a super relaxed fit after being cut. Plus, depending on how you cut it, you can leave room for your super cute lacy bralettes to peek through, which we all know I am ALL about. I'm not sure where this particular cut t-shirt style started, but I'm such a fan. I've seen it on a few bloggers, but Urban Outfitters also sells pre-cut shirts, so who knows. If you have a great vintage or thrift shop nearby, go digging for some fun old concert tees! I'm a sucker and bought the Zara version, but I had a vision in my head and just had to go for it (plus I don't really have vintage/thrift shops nearby to go hunting for the perfect tee). Again, you can make fun of me now.
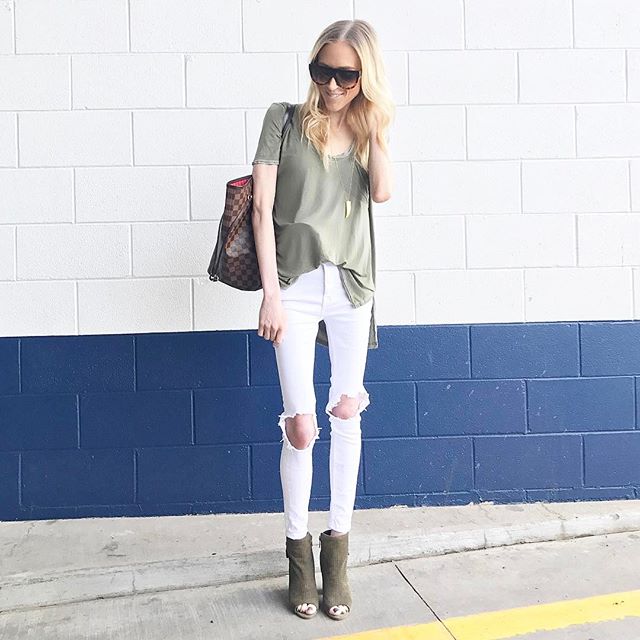
Anyway, this tee just makes an outfit. I paired with my MUST HAVE (seriously, if you don't own these yet, you really need to consider investing in a pair) leggings, fun booties, and a statement jacket. Easy, edgy and done. An outfit that can take you from happy hour and into the night with ease.
Here's a little diagram and explanation on how I cut my tee to achieve this look:

1. Mark your cutting points. Decide how wide you want your V to be and how deep. Mine is 7" wide and 8" deep. You can put the t-shirt on and mark while it's on your body if that helps. Mark your two collar points first, then from the center of your collar (use the the neck-tag as your guide) mark how low your V is going to go - this mark you make will be the tip of your V.
2. Once you have your markings, start cutting. It helps to the V first. Start at one of your collar points and cut on a diagonal angle to the bottom of your V point you marked, then match your angle as you cut the other side. Then, cut below the ribbed part of the collar. This is the most important part of all. All cutting has to be below the ribbed collar, otherwise you won't have a shirt.
This is one of those things that definitely doesn't have to be perfect. It's meant to be a fun beat up graphic tee sort of vibe. I also feel like it's much harder to explain than the process actually is. And if my oh so excellent instructions didn't do it for you, head to Pinterest or YouTube, or practice on an old tee. And if the thought of cutting a tee yourself is really just too much, you can purchase THIS already cut one and pretend you did all the work yourself. I certainly won't tell :)
I hope you guys enjoyed this look and the little DIY element. As always, thanks for reading, and please let me know if there's anything else you'd like to see on my blog!